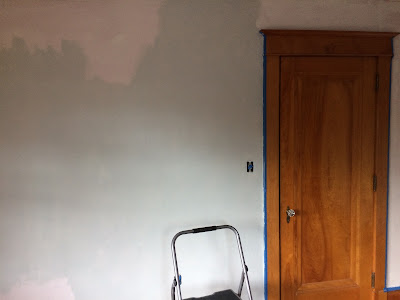
It took us nearly 3 months, but I am happy to say that the master bedroom is done.
Once we got the wallpaper down, removing the wallpaper paste was agonizingly slow. It was two steps forward and 1.99999 steps back. Over and over, as we tried different things. Finally? Sanding it. Not my first choice, given the age of the house and who-knew-what underneath the wallpaper, but we used respirators, cleaned religiously, and pushed forward.
Then we did a coat of Kilz oil-based primer to make absolutely sure, then tested out our chosen color: Sherwin Williams Sea Salt.
Then we painted, a whole lot. Two coats, during which I learned a LOT about painting. I have painted before but never this much. It was definitely not a professional paint job, but we learned a lot and we had fun and I love the color, end of story.
puppy helped!
Once the paint job was done, the carpet came up. We knew that in at least one corner of the room the hardwood floor was in impeccable shape. The carpet itself was vile - filthy, ancient, and the pad underneath crunched when you walked, it was so worn out and dry.
In fact, the entire carpet pad basically disintegrated into a 1" deep pile of yellow dust. I filled two shopvacs with it. Ugh.
I should mention at this point that Hannah was an extraordinary help during the last of the painting and the pulling up of the carpet. We then cut the carpet up into pieces using a utility knife and shoved it out the window, and gathered up what pieces of the pad were still intact into garbage bags. It was hot, dusty, gross work, but...
The floors were in perfect shape!
Next step: taking up the carpet tacks and staples. The staples were easy! I got a little staple puller thing and whoosh they were all out in 15 minutes. (I mean, I kept finding more as I kept cleaning, but they were quick and easy to take care of.)
The carpet tacks? They were not easy. I had polled my family as to the best way to do it, and my father thought I could just pry them up and pull, since they weren't usually nailed too deep.
Famous last words.
I ended up having to pry out every.single.nail. all the way around. Goooood grief. It took about 5 hours of really hard work, during which I smashed my fingers more than once because I was working in such close quarters to avoid damaging either the floor or the trim.
But, the good news? The floor was in perfect shape except for one 6" square where something had spilled who knows how long ago, soaking through the rug. No sanding and re-finishing necessary!
Next step: taking the blue tape off. You know how HGTV makes this look like a breeze, like your last cathartic step? Yeah. Fuck those guys. It took almost two hours of painstaking work, making sure I didn't leave any tape behind under built-up paint. Maybe we could've been more careful in painting to get less on the tape, but...life is short.
some puppy was not amused that I used her as a tape receptacle
Then there was floor mopping, of which there are no pictures. I ended up using a slightly damp mop and squirting Old English onto it, to do a combination gentle clean/revitalization. I left it for a few hours to dry/soak in. Then I skated around the floor with my feet on shop towels to clean up the last of the oil.
Finally, I had my floor. And wow. Just gorgeous.
Final decorating steps: new outlet covers all around, satin nickel Art Deco inspired metal covers that were expensive at $5 each but I just loved.
And the final touch: new curtains that I had bought a few weeks prior, just simple sheers with an embroidered vine design.
For reference, just so you can see how far we went, here's the original room.
And here's the same view now.
And huzzah!
The last remaining thing to be done is to haul the radiator away to get sandblasted and then re-painted. Right now, it is pink, and filthy, and chipping badly. I intend to repaint it a metallic silver color, roughly what it would have been originally, which will match any color scheme we decide on in the future. The radiator has been disconnected, and I have the place lined up to sandblast it, we just have to find the time and the energy to haul the thing out.
So, so, SO glad this is done, though, and it gives me hope for other future rooms!


gorgeous! congrats on the fruits of your labor!
ReplyDeleteIt looks phenomenal!! And you are SO right about removing painter's tape. Ugh.
ReplyDeleteThat's lovely. I wish there was wood under our hideous carpet :(
ReplyDeleteThose floors are GORGEOUS! Your master bedroom looks great :)
ReplyDeleteSo VERY impressed with your hard work and fabulous outcome!
ReplyDeleteWe have really gorgeous brick floors through a nice chunk of our house, questionable hardwood in the dining room, and fugly carpet in the rest. I'm so jealous of your hardwood jackpot. I'd LOVE to rip up the carpet.
ReplyDeleteNICE WORK. And yes, WHO COVERS THAT UP?!
ReplyDeleteLoooove those floors! Also loving the color you guys chose for the walls!
ReplyDeleteCan't believe how nice the floor was underneath that old carpet!
ReplyDeleteBeautiful floors!!! Little trick with the blue tape. Take if off right away after painting, before the paint dries.
ReplyDeletewow those floors look great! nice work :)
ReplyDelete