Tuesday, June 30, 2015

Helmet Shopping: The Results

Spoiler alert! I came home from my trip to Boston last week (and of course a stop by Smartpak), walked in the door, and announced to my fiance that I had found the sexiest piece of riding gear I have ever bought.

(He said, "I don't even know what it is and that is blatantly false." Luckily I found a boy who appreciates breeches...)

ANYWAY.

Thank you all SO much for your thoughtful, eloquent, and incredibly useful feedback on my helmet search. I read every comment multiple times, made notes, scoured websites, and thought a lot. I was ready to tackle the new helmet fitting process.

First: a moment of silence for my old helmet, which did yeoman's work and came the closest of any helmet I have ever owned to lasting until its expiration date, rather than being put out of commission by a fall.


It was an ugly thing, but it saw me through a lot.

On to the shopping!


I re-confirmed the following: Charles Owens do not fit my head, Troxels are ugly as sin, I still dislike the Tipperary style, and everything else was waaaaaay out of the price range. I did not even try on any Samshields or One Ks or all those other helmets the cool kids are wearing these days.

I narrowed it down to two helmets.


On the right, the IRH XR9. On the left, the IRH Elite Xtreme. Helmet names are getting as dumb as car names, seriously.

I wanted badly to like the XR9. It fit pretty darn well, actually. I just wasn't quiiiiiite sold on it, and since I was there in front of a wall o'helmets, and had an awesome Smartpak salesperson helping me out and talking through options with me, I put on the Elite Xtreme. And little angels sang in a choir.

The trick, as it turned out, was that the Xtreme came in a "long oval" size, which means that my head is even weirder sized than I expected. I put it on and it fit like a glove, and it settled down onto my head and I loved it. And then I looked at the price tag, and I wanted to cry, but I looked at myself in the mirror, and felt the helmet wrap around my head, and sighed. 

The salesperson offered to get the black version of what I was wearing but you know what?  That silver is awesome. It looks like a million bucks. It's not a show helmet - I have a wonderful velvet show helmet - and we don't even show anyway. 


soooooooooo sexy

Spending way more than I planned on my helmet did not stop me from swinging through the clearance section, which was filled with the usual tempting array. I escaped with this jacket (minus the Smartpak logo) for $25, and the Back on Track glove liners for $12.50, because 'tis the season for winter stuff on deep clearance.

I've now ridden in the helmet about a half dozen times and I loooooooove it. It's a little snug until the back harness softens and the lining breaks down a bit, but it turns heads, and I get a happy thrill from putting it on. It doesn't budge while I'm riding, and best of all, I actually look almost good for once.


post-ride the other day

In conclusion: way more $$$ than I anticipated, but WHOOOO for sexy new helmets!

Saturday, June 27, 2015

Weekly Blog Roundup

A few blog posts from the weekly roundup.

GoFundMe for Lauren from Fly On Over
I'm sure if you're reading horse blogs you've heard about Lauren's unimaginable heartbreak. I read her post just after it was published, while I was having breakfast with my maid of honor, about to meet my bridesmaids to pick out their dresses. Life is so odd, the way these things are juxtaposed and jumbled up.

Please consider visiting Tracy's page to help support Lauren.

It's official, Skeeter's Mine from Wilson's Wild Ones
Hooray for mustangs finding their forever homes. :) If you didn't know anything about the BLM adoption process, this is a good read.

So What Happens at a Paso Fino Show? from Tucker the Wunderkind
Totally different world than the one I'm used to - photos, explanations, utterly fascinating.

Question to Readers: Falling from Viva Carlos
Having recently fallen off myself, this was interesting to read. Make sure you check out the comments.

Yosemite Part 2 from DIY Horse Ownership
Uggghhhhhhh the jealousy, it burns. Go read this, and then read all the others in the series. Gorgeous photos, the trip of a lifetime.

25 things to know before your first 25 mile LD ride from Boots and Saddles
I've never ridden a 25 mile LD, but I've crewed and staffed my fair share, and these are great suggestions, many of them not obvious.

700 Posts from All In
Fun contest - definitely check it out!


Friday, June 26, 2015

Tristan's Scariest Scar

Tristan was a wild horse for four years in central Nevada. I wrote a little bit about where he came from here: the Callaghan Herd Management Area.

After that, he was in BLM custody for two years. After that, he was in an adoptive home for two years. Then he was relocated to the rescue for two years. Then he came to me.

At some point prior to coming to me, he acquired a really scary scar.


His roan coloring means that scars show up as darker spots against his coat. See just above his hock? That dark line along the tendon?

The picture doesn't show it very well, but it's actually a semi-circle, There's a matching one on the other side. Those are teeth marks.

Have you ever seen a horse - a boss mare, usually - herd other horses, head snaked down low, teeth bared? It's the equine body language equivalent of MOVE RIGHT THE FUCK NOW.

My best guess is that at some point Tristan did not move fast enough, and another horse bit him, just above the hock, on either side of that tendon. Badly enough to go through the skin, and then heal so that it left a pretty big scar.

He has never - knock wood - been lame on that leg, so it obviously healed. But can you imagine the perfect series of circumstances that had to occur so that an injury that gnarly healed without any lasting damage - in the wild?

Thursday, June 25, 2015

Tuesday, June 23, 2015

Equestrian Antiquing

The My future in-laws visited this weekend, which meant two things: they helped us accomplish a truly amazing list of things around the house, and we went antiquing.

Whenever I am turned loose in an antique store, I gravitate toward the horse-themed items. I have a small but growing collection of old veterinary bottles - magic  elixirs and salves, that sort of thing. I didn't find anything tempting yesterday, but I thought I'd take a few photos to share anyway!


This was an old candy tin. My most tempting find of the day, but not quite right.


This was actually a whole pile of turn of the century sleighing and other horse-themed prints.


Original art - definitely the nicest piece I saw that day, just not my style. The artist's last name was Schyler.


Sunday, June 21, 2015

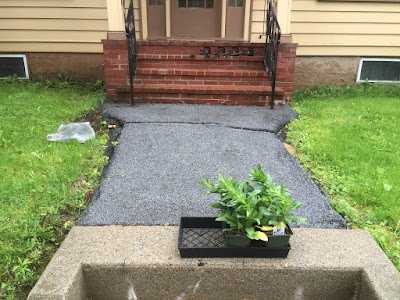
House Post: Planting the Front Walkway

The whole yard is more than a little overgrown, and will take quite a bit of work to tame. I have some vague ideas for the rest of the yard, but I'm waiting and considering and letting ideas bounce around in my head and settle before I go anywhere with them.

I had an idea for the front walkway start to bounce around a few weeks ago, and in the last week it coalesced. It started with some solar LED lanterns I found at Walmart, which matched both the style and the coloring of the house, and then took off from there.


Before: weedy, overgrown, kind of boring, etc.


Step 1: Dig out the turf in a small line on either side of the walkway. This sucked. A lot. I can't overestimate how much it sucked. I did the whole thing on my knees with a plastic hand tool, which really aggravated my back. I can't recommend it.

I spent a lot of time thinking about placement, etc. They are not in a perfect line, but rather a sliiiiiight curve to match the walk. It grieves me a little bit, but the lanterns are easily moved and the daisies will fill in anyway.

The plants are "Brightside" Shasta daisies. They are perennial, and will grow in more thickly each year. They'll also be on the taller side than I might've liked, so in a few years if they get out of control I may move the lanterns. We'll see.


Step 2: Plant the daisies and set the lanterns. I may have half-assed the sod removal on the right-hand side a little bit. #sorrynotsorry.


Step 3: Mulch et voila!

I still have to remove the piles of sod - you can see them a bit on the side of the mulch - and cut a stronger edging line. A smarter gardener than I would've done this from the beginning.

A smarter gardener would've had better tools, too, and wouldn't have hated doing this so much, probably. Ah well. At least it looks good!

Saturday, June 20, 2015

Weekly Blog Roundup

Here are some fun posts from the equestrian blogging world this week.

Rodeo Hangover from All In
Such a totally different and very cool world from the one I'm used to!

DIY Lattice Gate Horse Jump Tutorial from Fraidy Cat Eventing
So simple and it looks so terrific.

Product Review: Sun Shirt Showdown from She Moved to Texas
Great overview of three different shirts - and there's more good information in the comments.

Quite Possibly the World's Only Jousting Haflinger from Wyvern Oaks
Jousting. Haflinger. I don't think I need to say anything more.

But Wait - There's More! from Not So Speedy Dressage
Riding Lusitanos in Portugal! Siiiiiiigh.


Friday, June 19, 2015

I Love This Horse


After Tristan's great work on Tuesday night, I gave him Wednesday off, and then went back out last night. I waffled on my plans for the evening, all loosely centered around the idea of a short dressage schooling session. I couldn't decide where to ride: in the fields, with the uneven terrain adding a good balance element? in the outdoor, where I wasn't sure what the footing would be like after the rains? in the indoor, the boring but most focused choice?

I tacked up, and settled on the indoor, and then I stood at the door to the indoor and looked outside and just couldn't. It was 7:15 pm and still beautifully light out. We went outside.

I started off by warming him up at the walk in the fields, and made my decision there. They were too soggy in too many places to leave me enough useful space for schooling, so we went to the outdoor to test the footing. It was just fine - the rain had actually compacted it nicely, settling the loose sand that had made our lives harder last time.

I told myself to pay attention to how his feet were moving - the last time we were in the outdoor he tripped and I came off - and started him off.

He started off the trot warmup very up and down, so I stood up in the stirrups and let him have a bit of a canter. Not too much, since he wasn't up to it yet, but enough. He wanted to charge ahead but it was a good core workout for me to stay up in a two-point and yet holding him in. One of the best things to come out of our dressage work in recent years has been the ability to modulate his gaits from my core like that.

When we tried the trot again, he settled into it much better. My goal was simply to see what I had, and to get him to a good place to quit on. He started out like a 2x4, stiff and head-flipping, but pretty quickly steadied on the bit, and then started yielding to my leg back and forth off the quarter line. Once I had that re-installed, we worked on a 20m circle for a bit, opening the inside rein to soften up, pushing him out onto the outside rein.

We changed direction a few times, and then I asked for a very short canter to see what I had to work with. Again, he wanted to charge off, but I sat deep and held him in, and asked him to round up just a teensy bit. We started left, his trickier direction, where he has more power but less adjustability. He gave me a pretty good canter, and listened when I asked for some bend and softness.

After a minute or two, we took a long walk break and I kept an eye on his breathing. Thankfully, there was a good cool breeze coming down from the mountains, in advance of our predicted overnight thunderstorms. It was low 70s, and the breeze meant that when I wasn't actively riding I had goosebumps on my bare arms. Vermont! Even in mid-June you're chilly outside.

His breathing recovered quickly, so I picked him up tracking right again. I put him back together at the trot. Usually after a walk break he is a complete jerk, flailing and flinging and all don't wanna. Last night he actually got that over with a minimum of fuss, and within one or two laps of the outdoor was back between my legs and hands and ready to work. I put him on the bit, sent him a little deeper, and asked for the canter.

It started off disastrously: heavy, heavy, heavy, stiff as a board, alternating lagging with charging ahead. I was firm, and held him where I wanted him to be, put him on a 20m circle, and took zero shit. I was pretty pleased with how firm I was, actually, because I knew I didn't have all day to let him canter around like that - he was tired, it was getting late, and I didn't want him to overheat.

And then he put his head down. And he lifted his back. And he was a round bouncy ball for one, two, three strides - an entire 20m circle. I yelled GOOD BOY at the top of my lungs, and whooped, and then made a conscious effort to ride a solid down transition, held him together through a gorgeous, lofty, powered, light in the bridle trot for half the arena, then down to the walk, then dropped the reins and told him he was the best pony in the history of ponies.

We walked up and down the road for a bit to cool off, but his breathing came back remarkably quickly, and he was only a little warm by the time we got back to the barn, only the tiniest bit damp under the girth. He got a full rubdown and lots of treats.

Thus marks our first real dressage schooling session in over six months!

Wednesday, June 17, 2015

Riding Update: Actual Progress!

Hey crazy lady, stop taking pictures for your blog and let's get this over with.

We're continuing with trot sets, which are a little boring, but necessary.

Last night, we worked up to 8 minute trot sets with 5 minute rests in between them. When I do these I ask him for only the most basic acceptance of the bit: don't giraffe, maintain a good clip, and occasionally I'll ask him to stretch out and down a little.

As he's getting stronger and fitter and more willing, I'm asking a little bit more. So toward the end of the second trot set, I picked up the reins a bit more and saw what I had.

We did some tentative leg yields that smoothed out surprisingly quickly, then some spiralling in and out.

I put him on circles and worked the bend a little bit, and was more firm in my outside rein and told him the circle would be what I proscribed, no more, no less. He softened up his jaw, finally, and blew out noisily.

Then I used the circles to really get him into the outside rein, and asked for a little more engagement and a bit more of a frame. And he gave it to me - beautifully. Then he gave me more. The last 2 minutes of the trot set were in a lovely, deep, soft frame that was very nearly true self-carriage. It lacked a little bit of forward, a little bit more push from the hind end, but it was the best work he's done in months.

I called it quits on that, because damn. He was tired but pleased with himself because I was so happy. We went for a bit of a wandering walk around the property, and he proceeded to try to drink every single puddle dry. Guess he got himself a bit more tired than I thought!

Tuesday, June 16, 2015

5 Equestrian Products Worth Paying Extra For

As may have become apparent through this blog, I am pretty darn cheap.

However: there are some products out there that are worth buying on the more expensive end of things. They're not necessarily what most people think of first. I firmly believe that you can shop smart and get quality tack and clothing at a fraction of the price. (I paid $300 for my jump saddle, an older Passier, for example.)

Here are a few things that I personally have paid a bit more for and been thrilled with.

1. Oster Mane & Tail Brush

Buy @Smartpak, $11.95

I actually did a review of this mane & tail brush some time ago, and you can read my full gushing there.

Suffice to say: I was a buy cheap human brushes at Walmart horseperson...until I borrowed a friend's Oster. Holy mackerel. Little angels appeared and sang in chorus. It is legitimately that good.

I'm not sold on the other Oster brushes - they're nice enough, but not spectacular - but this? This is mane and tail brush perfection, and it is worth paying the

2. Brush Therapy Effervescent Brush Cleaner

Buy @Smartpak, $7.95 for two

This stuff? It is a miracle. A weird, powdery miracle in a purple tube.

It may seem indulgent, but trust me. It will change your life. Here's what you do: fill a rubber feed pan with water. Mix one package of this in. Place all your brushes bristle-side down, so the water covers the bristles. If you have wooden handles, go just below the handle; if you have plastic handles, get the water right up to the handle.

Wait 10 minutes. Take out perfectly clean, brand-new brushes. Rinse them once with clean water and you are done. Miracle.

3. Winter Tall Boots

Buy @Smartpak, range of prices

If you're looking at me funny right now - if you think it's weird to have a pair of tall boots just to ride in the cold - then you've never lived through a New England winter, and I kind of hate you right now. Kidding! No, actually, I'm not.

Is it more than a little indulgent to own an expensive second pair of tall boots for winter riding? Yes. Is it the only way to survive riding through 6' of snow and -17F temperatures with a modicum of grace? Yes. I don't care how many layers of Smartwool you wear underneath regular tall boots, it's not enough. It will never be enough. You need waterproof Thinsulate-lined boots designed for the purpose of keeping your feet functional when it's below zero.

I don't know that I have a specific product recommendation; I have the predecessor to the boots shown above, Ariats that I got as a gift about 8 years ago. They retailed for $250 then, and that's about what you'll pay for a good pair now. WORTH. EVERY. PENNY.

4. Elastikon

Buy @Smartpak, $26.95 for four

Have you ever wrapped a horse in vetwrap, and said every bad word you know and a few you invented while doing so as it slipped and slid everywhere? Like, trying to wrap a hoof? or a hock? or some other twisty bendy tricky part of a horse?

Elastikon is the magic wand you are looking for. It's sticky on one side, but stretches just like vetwrap. It sticks to hair, and then molds around whatever awkward thing you are trying to wrap. It wears like iron - easily twice as tough as vetwrap. I never try to wrap a hoof without it, and I would put the conservative number of hoofs I've wrapped at 2,163.


5. Sore No More Liniment


You can't buy this anywhere right now. :(

I also reviewed this in full. Since that review, there was a national shortage of Sore No More, and I could not get it at Smartpak or locally or anywhere. I sulked, but thought, well, it's expensive anyway. I ordered a bottle of Absorbine. FAIL. I am counting down the days until that bottle is gone.

Accept no substitutes. Pay the extra $ for Sore No More. You won't regret it. (If you can find it. Goddamnit.)

What about you? Is there anything on the more expensive range of products that you've tried and fallen in love with?

Cob Jockey's Blog Hop: Temperature, Pulse, and Respiration

A day late and a dollar short, as they say, but I've been writing "Tristan - TPR" on my to do list every day for the last two weeks, and last night at 9pm after book club finally got the last check I needed to take an average.

SO. Here's Cob Jockey's original post announcing the blog hop and the rules.

Tristan's TPR was a little bit of all over the place, but the averages ended up being:

Temperature: 99.5
Pulse: 30
Respiration: 15

Broken out by day, that was:

Day 1: T 99.4, P 28, R 16
Day 2: T 99.5, P 30, R 14
Day 3: T 99.4, P 32, R 14
Day 4: T 99.8, P 30, R 16
Day 5: T 99.5, P 32, R 16

So there we go! I'm glad to have that on hand again.

Monday, June 15, 2015

What helmet should I buy?

So, I fell off my horse. I fell mostly onto my hip and back, but in the rolling followup I smacked the back of my head against the ground, too.

It was a relatively minor fall - helmet didn't crack, no real headache, anything like that.

The helmet was already nearing the end of its useful life, however - the sticker inside said it was manufactured in November 2011 - and I am a firm subscriber to the rule of replacing your helmet whenever it gets hit.

In the past, I've mailed the helmet back to the company, used a backup (usually my show helmet), and then paid the nominal fee to replace it through the company. I've done this at least three or four times with IRH, and been very happy with that process. (Did you know you can and should do that? It's an important part of product research so that we can make helmets better and safer.)

After a marathon day spent trying on every single helmet at Dover Saddlery about 8 years ago, I've been loyal to one particular helmet: the IRH Air-Lite Dura Soft Touch.


It is not the most attractive helmet on the market, but it has many other virtues. It is light, vented, tough, and it fits my head perfectly. I've been really, really happy with it. As I said, this is at least my fifth one in a row.

But. You knew there was a but coming, right?

I'm ready to move on. I'm ready to ride in something a bit nicer, and a bit more stylish. The Air-Lite gives me the most incredible bubble head, and I'm kind of sick of it.

So this is where you come in, internet: what helmets should I try on when I head down to Smartpak next week?

Things to keep in mind:

- $200 max budget (who the fuck are these people who pay $1,000 for a goddamn helmet?!)
- oval-shaped head
- I hate the Tipperaries; I'm looking for traditional styling, black.

A quick internet browse leads me to believe I should be looking at Charles Owens and IRHs. I'll try on a wide range at Smartpak, see what they have in clearance, and if I don't love what they have there I can hit up a large Dover Saddlery nearby as well.

Would love any and all suggestions!

Sunday, June 14, 2015

House Post: Features I Love

So, last week I regretted the wallpaper decisions in the house. There are, however, some really wonderful features about this house - they're why we fell in love with it in the first place.

The house was built in 1928, and has a ton of classic charm. It's somewhere in between a Craftsman and a Colonial, with 1920s elements too. It holds together surprisingly well, stylistically. The previous owners went all the way into late 1970s/early 1980s Colonial Revival (see also, wallpaper). We'll be taking it more in a Craftsman direction.

In no particular order, my favorite features.


Three - count 'em - sets of French doors: dining room to living room to sun room.


The gorgeous simple design of the front door.


The swinging door between the kitchen and the dining room - servants, anyone?


The newel post at the bottom of the stairs. Sigh.


Every single door and every single window has the same matching woodwork and doors - all in perfect shape.


Detail of the matching doors. In real life they are closer to the warm wood tones of the above picture than this lighter image.


Every single door handle also matches, and they latch with the loveliest click.


Steam radiators! They hiss and pop and they make everything cozy. They also look awesome.


Sleeping porch on the second floor - these windows will pop out and be replaced with screens.

Saturday, June 13, 2015

Weekly Blog Roundup

Here are some interesting posts from the horse blogging world this past week.

Tips on Teaching from Hand Gallop
I am the worst riding instructor for people I know. I'm not allowed to teach my fiance anymore, on the rare occasions on which he will sit on a horse. I do better with little kids. These are good tips to keep in mind.

DIY Fun Breeches from The Owls Approve
AMAZING. How much fun is that?! Clever, thrifty, and oh so cool.

DIY How to Make a Rope Halter from DIY Horse Ownership
I admit, I am not a fan of rope halters and have never owned one, but that's my own personal weirdness. A lot of people love them, and this tutorial is great.

The Really Weird Reasons I Love Horses from Zen and the Art of Baby Horse Management
These cracked me up, but I have to agree with all of them!

For Sale from No Longer Fiction
Great stuff, great prices.


Friday, June 12, 2015

Help me find a new iPhone case

About six weeks ago, I took Arya for a hike in Groton State Park. We were out for about an hour and a half having a lovely time. I stopped on a bridge and thought wow, that waterfall is lovely, overrun with spring melt. I took a careful step to the middle of the bridge, had Arya sit, took out my iPhone, and took a picture.

I'm not sure what happened next. It just slipped out of my fingers, bounced, and then vanished. I stared at the edge of the bridge for a couple of seconds, and then clambered down the bank. Arya sat patiently by the side of the stream but as I perched on slick, mossy rocks and fished around in the stream with my hand, I thought, this is how those news stories start. The stream was running high, it was rocky, and there was no one for miles.

So we left my phone there, somewhere, and headed to the Verizon store, where I handed over my credit card and got a new phone. Mostly, it's been fine.

I bought a cheapo wallet case at Walmart for $2, which has been doing its job, but I am going to need something more substantial.

That's where you all come in!

I'd like this case to have a little more personality than my last iPhone case, which was a verrrry basic black Incipio slide-on case. It basically looked like a slightly thicker iPhone.

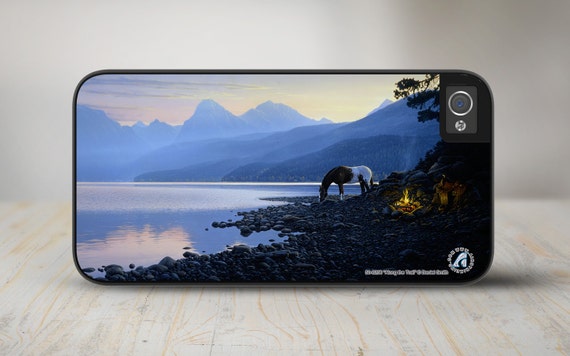
Ideally, I'd like a horsey-themed iPhone case. I've looked around and found some possible candidates, but nothing is jumping out at me. My first stop was DappleBay, but it looks like they discontinued their iPhone cases. Boooooo. I emailed them in hopes that there was some back stock, but never got a response. Double booooooooo.

Then, I headed to Etsy.

They ranged from the meh.


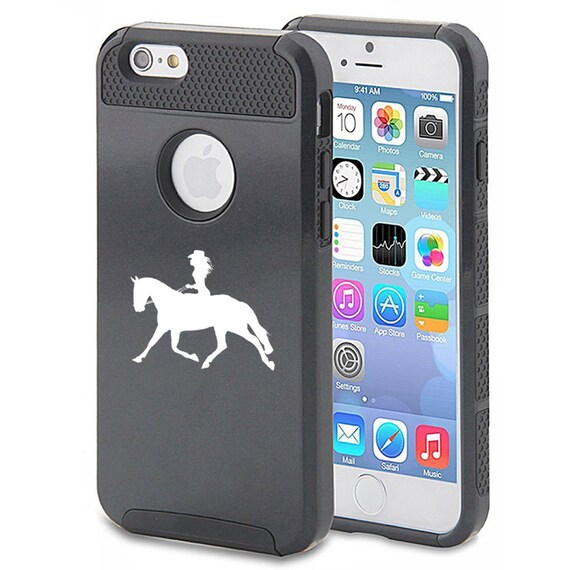
To the kind-of weird (why is that cowgirl riding an extended trot? anyone?)


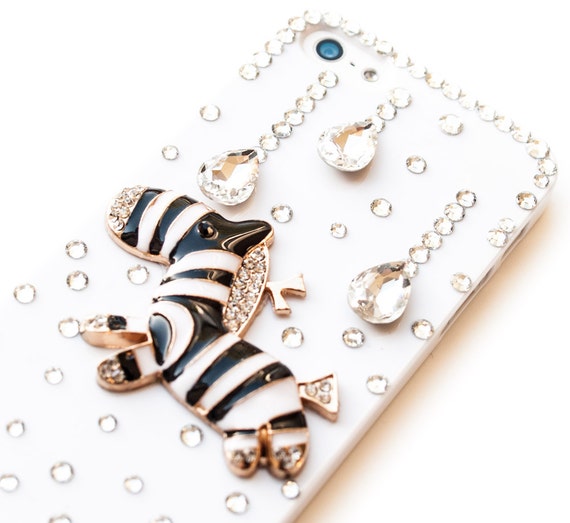
To the confusing.


To the really weird.


I'm also considering just a basic case, like the OtterBox Commuter with wallet, and then adding a sticker to the outside.


But what sticker?

Help me, internets. Do you have a horse-themed phone cover? Do you like it? Is there one you've always coveted?

Thursday, June 11, 2015

Riding Update: Conditioning & Longeing

What about my actual horse, you might ask?

Well. Not much exciting.

I'm riding, which is in and of itself exciting after the winter/spring we had. So there's that.

We've done about two weeks of a conditioning program. I am an expert at rehabbing this horse now. I spent some time really thinking hard about how to push him, looked for some new tools (reviews coming soon) and we've been diligently pursuing trot sets and planned days off since. I'm working him 4-5 days a week, huzzah for that.


Sunday, I came off. It's been four days now and I keep getting new and exciting aftereffects: mostly throughout my back, which seems to have re-aggravated an old riding injury. It's not dire, but it means I've been moving more slowly and making my fiance bring up all the boxes from the basement to unpack.

Since then, I haven't felt up to hijinks, so I've been longeing in his chambon. I love that thing. With the understanding that it does really make him use his muscles, I'm longeing for ~35 minutes, then giving him a day off. Probably I will get back in the saddle on Sunday.

Summer means bath season again. Baths are the WORST.

The good news is after 40 minutes of longeing on Tuesday, which included canter in which he had to put his damn head down, he was only slightly warm to the touch at the end. It was a muggy, humid day in the 70s, so the fact that he was a) not blowing and b) not warm made me feel good. He was clearly a little muscle-tired, and drank half his bucket when he got back to his stall, but more of a good workout tired rather than an out of shape exhausted.

He's also in good weight and I like where his topline is headed. I just have to stick to my guns and keep pushing him instead of getting nervous and backing off.

Wednesday, June 10, 2015

How I Spend $40 a Week on Groceries

Some time ago, I wrote a post about how I've managed my horse finances. It hasn't always been easy. When I first got Tristan, I was making less than $20k a year. I lived on $20 a week for groceries. Read the original post if you want more details.

I've mentioned on and off over the years that I still only spend about $40 a week on groceries for the two of us, and people have asked me how we do it. I thought I'd sit down and spell that out.

The following list is not comprehensive, and it's important to understand that there are a few things that do not count in our grocery bill: toiletries, pet food, and the occasional splurge, which I usually cover as part of my own personal spending. (See also, the $11 jar of locally made hazelnut chocolate spread from the farmer's market last week. NOT the most efficient use of grocery funds!)

(photos are all public domain, and linked to their originals on Flickr.)


1. Loss leaders

You may have heard this phrase before. "Loss leaders" are items that are on sale that a store will sell at a loss. The goal is to get you in the door for those spectacularly priced items, and then hope that you will buy other things in order to make up the margin. Think the Black Friday sales at 4am.

Here is the trick to loss leaders: don't buy anything else. In a typical week, I sit down with 2-3 grocery store circulars (the sales ads from newspapers; they're all available online on store websites now) and skim through them. I make a note of what's on sale where, and whether it's worth going to two or more stores. Sometimes it is - if they're on my route, if the sale is good enough - and sometimes it's not. This takes about 30 minutes, max. I often do it during lunch at work on a Wednesday or Thursday.

Keep at this and over time you'll get a sense of a few things. Loss leader sales ($1.99 for boneless chicken breast is a good one up here) repeat at regular intervals. They are located in specific places in the circulars, often mixed among mediocre sales and non-sales. The first page is a good place to start, but look through the whole thing until you start learning instinctively where to look.

So shop for those loss leaders, and don't get suckered into buying five other things that aren't even on sale. Eventually you get into a rhythm: you know how much of something that goes on sale regularly you'll need before the next purchase. I buy, for example, about 5lbs of boneless chicken breast for $10 about every 8-10 weeks. I freeze each chicken breast individually, and since they're big, they're about one meal's worth for my fiance and I. A few weeks ago, I bought 12 boxes of Annie's mac & cheese for $0.88 a box. It usually retails for $1.99 - $2.59 a box


2. Compare prices

Shopping for loss leaders only works if you have a sense of what a good price is. I could tell you, off the top of my head, the prices for my most commonly purchased items at 4 different grocery stores that are on my regular commuting route. I am always scoping out new items and new prices and cataloging the in my head. It's one of the reasons my fiance refuses to go grocery shopping with me: I take my time and always look at three times as many things as I end up buying.

It's part of the game for me. I enjoy food. I like buying it and cooking it and figuring it out. So I'm always curious what's new on the shelves, how much it costs, how much it would take to make a meal with, and keep that information in my head when I'm thinking about meals for the week.

Corollary to this rule: don't buy brand name unless you have to. I buy a mix, based on ingredients and personal preference. I'll always try out a store brand and see how it goes. Sometimes it's utter crap and we soldier through a box and then never buy it again. Sometimes it's exactly the same and costs half as much. For example, there is no mayonnaise but Helmann's mayonnaise and both store brand and Miracle Whip are the devil's piss. But generic ibuprofen is totally fine. I have a handful of dietary restrictions that mean I buy name brands more often than I like - high fructose corn syrup, for example, triggers my gout, as do many of the preservatives in cheap deli meat - but it's all about finding that personal balance.


3. Make a list and stick to it

I can't emphasize this enough. Make a list. Write down the things you need to buy and do not buy anything else. Force yourself to walk out of the store if you have to. When you sit down and look at the grocery store circular, you are in a calm, logical frame of mind. Don't make the list when you're hungry, stressed, upset, etc. Reflect on what's in your fridge and your cupboards, on your week coming up, on any longstanding cravings or curiosities. Peruse the loss leaders.

When I make a list, I do two things, which I admit are a bit obsessive. First, I divide the list by grocery store, and then put items in the order they will be found in the grocery store if I'm making my typical route. See above re exploring the grocery store, getting to know the layout and what's available. That means that I spend less time going back and forth and am therefore less susceptible to the traps at grocery stores - and I don't say that lightly. There is actual science in the way that grocery stores are laid out. They are designed to keep you wandering and to attract your attention to buy more food. Don't let them.

The second thing I do is I make a quick notation of price next to the item. I round up for any cents so I'm sure that there's overage. Then I skim the list and do a quick mental tally. If I've reached the end of my must-haves for the week with room left in the budget, that's indulgence money. I think about something I want to snack on at work or the barn, something the fiance loves but I rarely buy, or a new ingredient for a recipe I want to try. If it fits in the budget, then I add that to the list. Some people do meal planning; this has never worked for me. Instead, I have a set list of things that I buy on a regular basis, and a variety of ways to combine them depending on mood and time.

Final corollary to this rule: for the love of little green apples, do not go grocery shopping while hungry. Your eyes will get bigger than your stomach and you'll end up at the register staring at the pile of food you just bought and wondering how in God's name you will a) afford it all and b) eat it all. See also, the three different kinds of ice cream in my freezer right now.


4. Learn to eat creatively

All of my tips assume that you are at least a semi-competent and/or adventurous cook. If you are buying pre-made foods, pizza, quick and easy stuff, then you're screwed no matter what. There is simply no way to put together an affordable, healthy grocery shopping trip buying things you can just throw in an oven or microwave. I'm sorry.

Cooking is not difficult. It takes time, sweat, tears, some ruined food, and patience, but it is not a difficult thing unless we're talking really complicated stuff. Look: if I can spend 9 months killing the rise on every loaf of bread I made, then you, too, can learn basic kitchen skills. Once you do, the world's your oyster. You can be clever and thoughtful about the ingredients you buy and the way you put them together.

Cooking skills are the difference between "aaaaah, there's nothing in the cupboard, I have to order a pizza!" and "hm, I have a few weird ingredients but I think I can make something of this." Learn the flavors you like, and how to play around with food to make them. This will also help you with the loss leaders: typically there are 2-3 items of in-season produce that are dirt cheap. Buying lots of that and learning how to convert it into tasty food is an invaluable skill.

Corollary to this rule: eat less meat. Your bank account and the environment will thank you. I am most emphatically not a vegetarian, but between dietary and budgetary restrictions, I do a lot of experimenting with different kinds of protein. Meat is, for its dietary impact, ludicrously expensive. I only ever buy it on sale. Ever. I really mean that. We eat meat once, maybe twice a week. In the meantime: lentils, beans, eggs, nuts, and other delicious things are great for protein and they're all cheap.


5. Buy in bulk when you can

Say it with me: price per unit. You don't even have to be good at math. You don't even have to have a calculator. Most grocery stores will put the price per unit on the tag on the shelf! The typical grocery store price tag has the name of the item, and the price of the item. To the left of the price of the item is almost always the price per unit - per ounce, pound, gallon, you name it.

Buying small, cute sizes of non-perishable groceries is a fool's errand. I have lived in tiny, tiny apartments, and so I feel confident in saying to you that no matter how small your kitchen is, you can find some things that make more sense to buy in bulk. We're not talking Costco levels of absurdity, here. Just looking for a few seconds longer at the label and realizing something like this: that jar of mayonnaise is $3.89, which is a bit pricey when there's a smaller jar next to it for $1.89. But look! The large jar is more than twice as big, and its price per ounce is $0.15 less. That means that each delicious spoonful of this mayonnaise costs less, and the jar will still fit easily in my fridge. Try not to think too hard about the black magic that means mayonnaise never goes bad.

Obviously, caveats apply: you need to eat these things regularly, you need to have a plan for the food you buy, both for storage and consumption, and you need to be smart about it. Yes, 200 rolls of toilet paper for $0.50 per roll is a great deal but when have moved that same package of toilet paper from three different apartments, you will regret it.

Last piece of this rule is to also think about your price per serving of food. I have rough rules in my head for breakfast, lunch, and dinner, and what constitutes a less versus more expensive type of meal. My typical breakfast is $0.50 - $0.75 in food costs: one English muffin ($0.25), 2 tbs peanut butter ($0.15), one mug of tea ($0.10). If I went with an egg and a slice of cheese instead it's closer to $0.75. Still way less even than the dollar menu at McDonald's, and tastier besides!

Let's apply this rule to dinner. I try to stay below $2.00 per person. I most often accomplish this by cooking in bulk and saving servings for lunches later in the week. Chicken casserole, which makes 6 servings: chicken ($1.00), box of pasta ($0.88), chicken stock (free, because I make my own, but for the sake of argument, $1.00), butter ($0.50), flour ($0.25), milk ($0.50). That's a base of $4.25; typically, I'll add some kind of in-season vegetable to it, like mushrooms or broccoli or peas. Let's say that brings it up to $6.00. That's $1.00 per serving. Maybe I have a glass of milk and a salad on the side - another $1.50.

You can make yourself crazy doing the math for every penny, but the really important thing is to just think about it, a little bit.

So, that is the very long, possibly overly-involved way that I keep our grocery spending to around $40 a week. Some weeks more, some weeks less. With the new house, I went on a bit of a stocking up rampage and spent $110 in one grocery trip, which still makes me slightly queasy. OTOH, we are set through most of June, so there's that?